Travel organization · RESEARCH-BASED BUYING GUIDE
Measure a Shoe Bag Around Your Actual Footwear
Shoe bags are often pictured with compact trainers, but your own footwear may be longer, taller or less flexible. A useful bag keeps dirty soles away from clothing without forcing shoes into a distorted shape. Measure the actual pair and decide whether one shared pouch or two separate sleeves fit your luggage better.
As an Amazon Associate I earn from qualifying purchases. We have not hands-on tested the products discussed in this guide.
Arrange the pair before measuring
Clean off loose dirt, then position the shoes in the arrangement you are willing to pack. Sole-to-sole, side by side and heel-to-toe layouts produce different shapes. Measure the resulting length, width and height. Include a shoe tree only if you actually intend to travel with it. A bag described for a particular shoe size may still be too narrow for a bulky sole or high upper.
Compare one pouch with two sleeves
A shared pouch creates one tidy module and can be easier to retrieve. Separate sleeves let you fill the spaces along a suitcase edge and keep shoes apart. The tradeoff is an extra closure and two items to keep track of. Model both layouts with existing clean bags before purchasing. Do not compress a rigid pair simply to fit a rectangular organizer that looks neat in an empty case.
Choose material around the return trip
Mesh offers visibility and airflow but does not keep fine dirt or moisture away from surrounding items. A closed fabric pouch provides separation but may trap damp footwear. No ordinary shoe bag should be treated as odor elimination or a reason to pack wet shoes indefinitely. Allow footwear to dry when practical and follow the maker’s cleaning instructions for the bag after use.
Start with an existing barrier
A reusable cloth bag may be enough for clean spare shoes on a short trip. An appropriate washable shoe pouch adds convenience when muddy soles and frequent packing make cleanup important. Check whether the opening exposes the whole pair and whether seams sit where the soles rub. If you only pack shoes occasionally, an existing suitable sack may be a better choice than a specialist set in several sizes.
Compare the practical approaches
| Approach | Where it helps | Layout benefit | Tradeoff | Fit check |
|---|---|---|---|---|
| One shared zip pouch | A broad suitcase area holds the pair together. | One module to remove and inspect. | The space between irregular shoes may become unusable. | Measure the arranged pair and test the opening with both shoes. |
| Two separate sleeves | The case has useful gaps along opposite edges. | Each shoe can occupy its own suitable space. | Two items must be labeled, closed and accounted for. | Check each shoe in its own natural shape and inspect nearby delicate items. |
| Existing clean cloth bags | Spare footwear is clean and only needs ordinary separation. | A low-cost way to trial two positions before buying. | Do not assume moisture or fine dirt containment. | Check the fabric condition, closure and any marks that could transfer. |
| Leave the spare pair out | One pair genuinely suits the itinerary and your needs. | Avoids the footwear volume and any new organizer. | It is unsuitable when another real activity requires different footwear. | Review actual planned activities instead of removing a necessary pair merely to save space. |
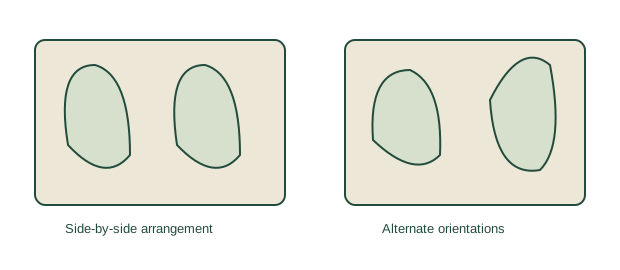
Illustrative fit check: height defeats a promising rectangle
Imagine a pair arranged heel-to-toe with an overall measured envelope of 33 by 24 by 13 cm. These are invented numbers for a packing exercise, not dimensions of a real shoe or a product we tested. The traveler sketches a mock organizer interior of 34 by 25 by 11 cm. Length and width appear promising, but the example's 13 cm shoe height exceeds the mockup's 11 cm height before any practical closure clearance is considered.
Rather than flattening the uppers to make the rectangle work, the traveler makes two separate paper footprints and tries individual clean sleeves they already own. One shoe sits along each suitcase edge, with soft clothing in the central space. They then check that the lid closes normally and that neither sole presses into a delicate object. A layout that fills a visual gap still fails if it distorts the footwear or makes the case difficult to close.
For the return, they reconsider the barrier itself: street dirt or damp shoes may call for a different suitable temporary separation plan, and ordinary cloth should not be assumed to seal either away. They follow footwear and container care instructions and dry items when practical. If the existing sleeves remain adequate, no purchase is needed. If not, the next search uses the actual footwear envelope, intended opening and cleaning routine rather than only a listed shoe-size range.
Record a footwear envelope and a suitcase layout
- Clean away loose surface dirt as appropriate, then arrange the actual pair without forcing an unfamiliar bend. Follow the footwear maker's care instructions and include any support you genuinely intend to pack.
- Measure length, width and maximum height of the combined arrangement. Repeat for each individual shoe if separate sleeves are an option, noting the sole width and tallest upper point.
- Compare usable container dimensions rather than outside measurements alone. Examine the opening, seam position and closure path; a fitting interior is insufficient if inserting the shoe requires force.
- Make paper footprints and trial the pair in your actual suitcase beside the other planned contents. Close the case normally, reopen it and inspect whether any shoe or neighboring item has been pressed out of position.
- Write a return-trip cleaning and drying plan. Choose material for the separation you need, and buy only when the current bags fail a specific fit, retrieval or cleaning check.
Is it worth adding to your kit?
Consider it if
Your actual footwear repeatedly soils clothes or is awkward to retrieve.
Skip it if
A suitable reusable bag already separates the shoes without wasting space.
COMPARE FEATURES, THEN CHECK THE LISTING
Explore the options
These are category search results, not a claim that every result fits this guide. Match dimensions, contents, care instructions, and seller details before choosing.
Search Amazon (paid link) ↗We may earn a commission from qualifying purchases. Prices and availability are shown by the retailer.
Common questions
Will a shoe bag remove smells?
Do not assume so. Separation and ventilation are different functions; dry and clean footwear as appropriate.
Should I choose by shoe size alone?
Use shoe size as a rough clue, then compare the actual packed dimensions and opening. Sole shape and upper height matter too.
Sources and editorial scope
Primary references support the product-category examples and documented features. Fit exercises, buying decisions, and existing-gear alternatives are Practical Trail editorial guidance. References were reviewed for this guide on October 13, 2026; specifications and product versions can change. This article does not present independent test results.
How our guides are prepared →