Travel organization · RESEARCH-BASED BUYING GUIDE
Choose a Seat Pouch Without Taking Over Your Legroom
An in-transit pouch should solve one problem: retrieving a few essentials without opening the main bag. It should not become a second personal item stuffed with every possible comfort accessory. Start with the things you reach for while seated, then choose a pouch that keeps that specific collection manageable.
As an Amazon Associate I earn from qualifying purchases. We have not hands-on tested the products discussed in this guide.
Separate seated needs from arrival needs
Place your phone cable, glasses case, tissues, reading item and other likely seat essentials on a table. Put arrival-only items elsewhere. Rehearse picking up this small group with one hand while your other hand holds a bag. That exercise reveals whether a compact handle matters more than several extra pockets. It also prevents a large organizer from acquiring things simply because space is available.
Measure the filled shape
Use an existing zip pouch first and measure its thickness after loading it. Flat dimensions alone are misleading when a bulky glasses case makes the center balloon. Compare the filled pouch with the accessible compartment of your own bag. Keep the pouch inside permitted luggage when boarding; an accessory manufacturer cannot determine the baggage allowance for your itinerary or guarantee that a seat attachment will be allowed.
Choose an opening you can control
A wide opening lets you see everything but makes small items easier to spill when the pouch rests on your lap. A top zipper offers containment, while a clamshell layout is better on a stable surface. Prefer a simple arrangement that you can close before standing. Dangling hooks and long straps add setup work and can interfere with getting in or out of a narrow row.
Try the zero-purchase version
An old pencil case can be an effective seat pouch if it holds the real load and slides into your bag easily. Use separate small sleeves for scratch-sensitive items rather than demanding padding throughout. Empty the kit after each trip so receipts and spare cables do not accumulate. Purchase a purpose-made seat organizer only when a repeated access problem remains after you reduce the contents.
Compare the practical approaches
| Approach | Useful situation | Access advantage | Tradeoff | Try before buying |
|---|---|---|---|---|
| Existing bag pocket | Only a phone cable and tissues need quick access. | No extra container to locate, open or carry. | A deep pocket can hide small objects; shared keys may need separation. | Remove unrelated contents and give each essential a consistent position. |
| One top-zip pouch | Several small items are always retrieved together. | One removable group; opening can remain partly closed on your lap. | A bulky glasses case may turn a flat pouch into a thick lump. | Load an existing pencil case and check the resulting thickness. |
| Shallow clamshell pouch | You normally arrange accessories on a stable permitted table. | The open layout shows the full kit at once. | Opening it fully needs space and can expose loose contents. | Rehearse on a small surface without balancing the pouch precariously. |
| Two small modules | A reading kit and occasional electronics have different retrieval patterns. | You can take out one group and leave the other packed. | Two closures and two locations may be harder to remember. | Label the groups by their tasks and test retrieval without unpacking both. |
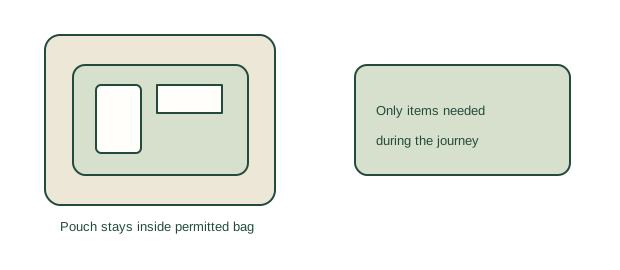
Illustrative packing exercise: a reader's four-item kit
Imagine a traveler bringing a paperback, glasses in their appropriate case, tissues and one suitable cable. This is a hypothetical planning example, not a test of any commercial pouch or an aircraft-space measurement. On the table, the paperback determines the required length while the glasses case determines thickness. Placing everything in one rectangle looks tidy but means removing the whole group whenever only the tissues are needed.
The traveler tries an existing top-zip pencil case for the tissues and cable, leaving the book and glasses case in their own accessible bag positions. They sit in a normal chair with the packed bag beside them, retrieve each item, close the pouch, and stand up. They record which steps require putting an object down and which make them move unrelated belongings. This rehearsal reveals access friction without pretending to simulate a particular aircraft cabin.
If the tissues still disappear beneath the cable, a small internal slip pocket may be useful. If everything works, the existing case is enough. The traveler also checks the operating airline's current rules before travel: Delta, for example, specifically prohibits window and tray-table organizers and items attaching to the aircraft. That restriction is airline-specific. Buying a product called a seat organizer does not establish that any fixture attachment will be allowed.
Write a seated-access plan
- List each item you expect to use while seated, then write its first likely use. Move arrival-only items to another list so the pouch does not become a catch-all.
- Choose the two most frequent retrievals. Sketch their locations in your packed bag and identify which closure you must operate for each one.
- Measure the candidate pouch after loading it, including the widest bulge. Check whether you can remove and replace it through the bag's actual opening without squeezing protected items.
- Rehearse close, retrieve, replace and stand up using your existing bag. Write down a specific failure, such as a hidden tissue packet, instead of a vague wish for more organization.
- Keep a purchase only if its opening or pocket arrangement addresses that failure. Check your airline's current baggage and attachment rules separately, and keep the kit contained as instructed by the crew.
Is it worth adding to your kit?
Consider it if
You repeatedly retrieve the same small items during long train or plane journeys.
Skip it if
Your bag already has an accessible pocket that holds the same kit.
COMPARE FEATURES, THEN CHECK THE LISTING
Explore the options
These are category search results, not a claim that every result fits this guide. Match dimensions, contents, care instructions, and seller details before choosing.
Search Amazon (paid link) ↗We may earn a commission from qualifying purchases. Prices and availability are shown by the retailer.
Common questions
Should I hang it from the seat?
Check your operating airline’s current rules. Delta, for example, prohibits window and tray-table organizers and items that attach to the aircraft. The pouch arrangement illustrated here stays inside your permitted bag and uses no seat attachment.
Does more organization save space?
Not automatically. Pocket walls and padding occupy space; compare the filled pouch against a simpler zip case.
Sources and editorial scope
- Travelon: World Travel Essentials Seat Pack Organizer ↗
- Peak Design Tech Pouch ↗
- Delta Air Lines: Carry-On Baggage, Comfort Items and Personal Devices ↗
Primary references support the product-category examples and documented features. Fit exercises, buying decisions, and existing-gear alternatives are Practical Trail editorial guidance. References were reviewed for this guide on October 13, 2026; specifications and product versions can change. This article does not present independent test results.
How our guides are prepared →